Superfeet
-
How to Size Your Supefeet
Every shoe manufacturer has their own sizing, which can be very confusing. One brand's size 8 is not necessarily another brand's size 8. Many people wear shoes that are too small or too big because they don't know what size they truly are. To help avoid this confusion and preoccupation with size, Superfeet identifies each of their product sizes with letters. Each letter represents approximate sizing based on the footwear industry's manufacturing scale. Here is a quick way to size your Superfeet.
Size Guide Stock Size 2 4 6 8 10 12 14 16 UK Size 13 - 1½ 2 - 3½ 4 - 5½ 6 - 7½ 8 - 9½ 10 - 11½ 12 - 13½ 14 - 15½ Euro 32 - 33½ 34 - 36 37 - 38½ 39 - 41 42 - 44 45 - 46½ 47 - 49 50-52 Superfeet Size A B C D E F G H Trim and Fit Your New Superfeet Insoles
The way you trim your insoles can have a great effect on how well they will work and feel. For an ideal fit, follow these simple steps:
STEP 1
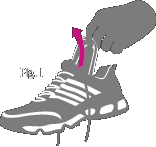
Remove the insole that came in your shoe. To work properly, your Superfeet insole should lie on the bottom surface of your footwear. It should not rest on any additional insole, arch pad or heel cushion material. These items should be removed.

STEP 2
Place the original insole over the top of your new Superfeet insole, lining up both the heel and inside edge. With a marking pen, trace the original insole pattern onto the new Superfeet insole. Trim the insole by cutting along the inside edge of the tracing line. Care should be taken not to trim too short. Trim it, try it. Trim it, try it.

STEP 3
Fit your insole into your footwear, resting it properly on the bottom. The insole needs to have minimal back-to-front movement inside the footwear (about 2mm) to ensure the insole moves with your foot and is not jammed heel-to-toe. This is very important. Properly trimmed, your insoles will fit easily into your footwear without a struggle, and will not curl up in the toe area.
